Am I a RETURNING MEMBER?
You are a RETURNING MEMBER if you have purchased an OLLI at UConn annual membership, at any time, from the Fall 2013 session to present.
STEP-BY-STEP INSTRUCTIONS
1) Click HERE to Access the OLLI at UConn Registration Page.
The registration site will open in a new tab. Keep this tab open to refer back to instructions.
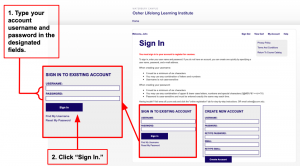
2) Sign In To Existing Account.
ALL returning members have an active online account. If you have used the online registration system before, sign in using the same username and password as you have in the past. If you have never previously accessed your online account, click HERE for instructions on how to retrieve your account password. Your username is: firstname.lastname
A) In the “Sign In To Existing Account” box, at the bottom of the screen, type your username and password in the designated fields. Then, click “Sign In.”
3) Add the OLLI at UConn Membership Course to Your Shopping Cart.
Only add the annual membership if you are up for renewal. If you are unsure if you need to renew your membership, then click on any course. If the “Add To Cart” button is available, then you have an active membership and do NOT need to renew your membership yet. If you are signed in, and the “Add To Cart” button is not available, then you should add the annual membership to your cart.
A) Make sure you are signed in to your user account (see Step 2, above)
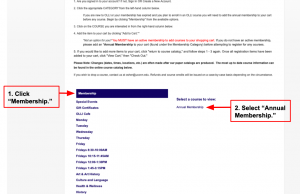
B) Select “Membership” from the list of categories on the left-side of your screen, and then click on “Annual Membership” on the right-side of your screen. This membership is valid for 365 days from the purchase date.
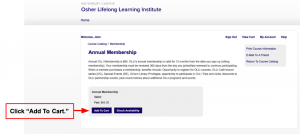
C) Click “Add To Cart.”
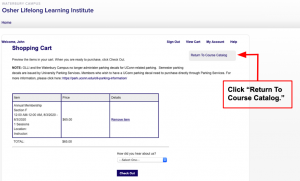
D) Click “Return To Course Catalog.”
You may now register for courses/ parking decal/ OLLI Cafe, or any other items that require an active membership to register.
4) Choose Your Classes.
Search for courses by category or by time slot, and add desired courses to your shopping cart. Click “Return To Course Catalog” after each course is added to your shopping cart.
*This requires the same exact process as registering for your annual membership. If you get lost, or you are unsure, refer back to Step 3.
Repeat this step for each item you would like to add.
5) Review Your Selections.
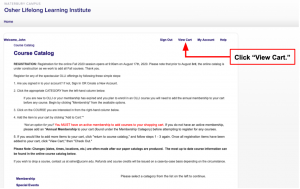
A) Once you have added all of your selections to your cart, you may review your items by clicking “View Cart” at the top-right of your screen.
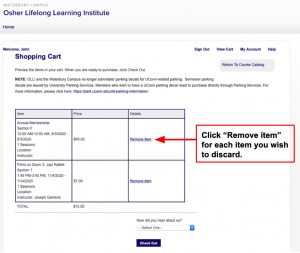
B) Before clicking the “Check Out” button, confirm that you have the correct classes and that you have only selected one class per time-slot. If there are any item(s) in your cart that you wish to discard, then you may click “Remove Item” in the box directly to the right of each individual item. This will remove the unwanted item from your cart.
6) Submit Your Order.
Before proceeding with checkout, make sure you have added to your cart: a Parking Decal (if needed – decals expire in August of every year), OLLI Cafe, and any other special events you wish to attend.
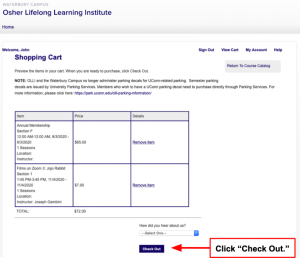
A) Once you have finished reviewing the items in your shopping cart, click “Check Out.”
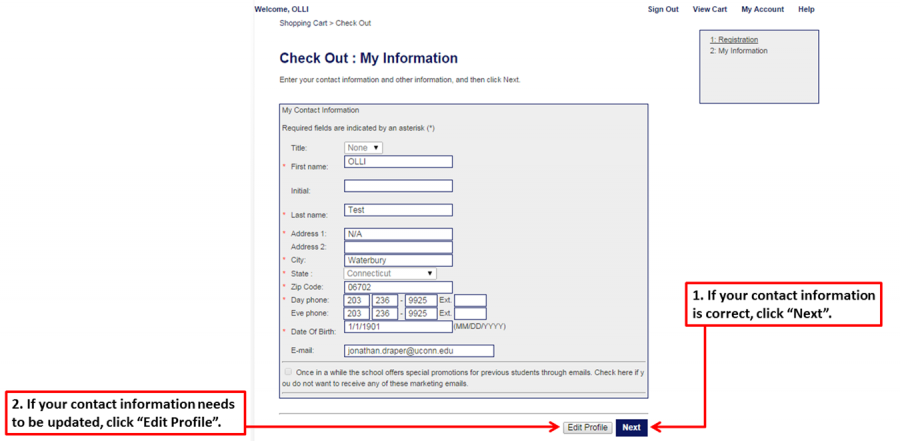
B) You will then be asked to verify your contact information.
If the information is correct, then click “Next” and proceed to step 6C.
If the information needs updating, then click “Edit Profile,” make your changes, and click “Save Changes”. Then, click “Next.”
C) If you are registering for a Parking Decal, please use this screen to fill in your REQUIRED vehicle information. If you do not have a Parking Decal in your cart, then click “Next” to proceed to the “Payment Method” portion of checkout.
D) Choose your payment method.
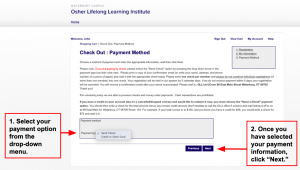
Select your payment method from the “Payment type” drop-down menu. You may choose to send a check or to pay with one of the following credit card options: Visa, Master Card, or American Express.
Once you have selected your payment method, click “Next.”
E) Confirm your billing information.
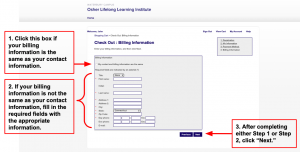
If your billing information is the same as your contact information, then check off the box next to “My contact and billing information are the same.”
If your billing information is different from your contact information, then type the correct information in the appropriate fields and click “Next.”
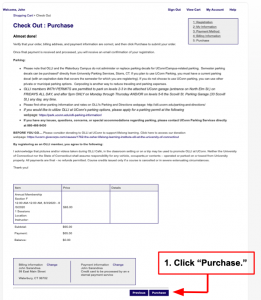
F) Review your order one last time. If the “Purchase” page includes all the items you intend to register for, then click “Purchase.”
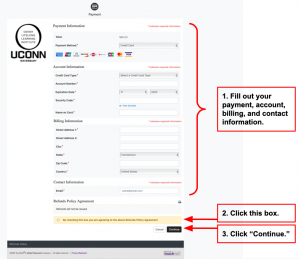
G) Once you click “Purchase” you will be directed to another page where you will be prompted to fill out your payment information.
After you fill in your payment information, click the box to the left of “By checking this box you are agreeing to the above Refunds Policy Agreement” under the “Refunds Policy Agreement” section, then click “Continue.”
Once you submit your order, you will receive a receipt and an email confirmation. Please review and make sure it reflects what you intended to order.
